Payments
This guide sets up payments for local testing with either Unibee, Stripe or Lemon Squeezy.
What should I choose?
-
UniBee is for teams that need control, coverage, and customization in markets and categories others do not support.
-
Stripe excellent for card payments.
-
Lemon Squeezy is great as a Merchant of Record. This means they take care of paying taxes in multiple countries for you, but charge higher fees per transaction.
Choose your payment processor
Open src/payment/paymentProcessor.ts and select one provider.
    // UniBee Payment Processor Integration Example
    // This example shows how to integrate UniBee's API for payment processing
    const UNIBEE_API_KEY = 'your_api_key_here';
    const UNIBEE_API_URL = 'https://api.unibee.com/v1';
    // Initialize UniBee client
    class UniBeeClient {
        constructor(apiKey) {
        this.apiKey = apiKey;
        this.baseUrl = UNIBEE_API_URL;
    }
    // Helper method for API requests
    async request(endpoint, method = 'GET', data = null) {
        const options = {
        method,
        headers: {
            'Authorization': `Bearer ${this.apiKey}`,
            'Content-Type': 'application/json',
        },
    };
    if (data) {
        options.body = JSON.stringify(data);
    }
    const response = await fetch(`${this.baseUrl}${endpoint}`, options);
    const result = await response.json();
    if (!response.ok) {
        throw new Error(result.message || 'API request failed');
    }
        return result;
    }
After choosing, remove the unused provider to keep the project lean.
- Delete the unused directory at
/src/payment/<unused-provider> - Remove unused env vars from
.env.server(for exampleSTRIPE_API_KEY,STRIPE_CUSTOMER_PORTAL_URL,LEMONSQUEEZY_API_KEY,LEMONSQUEEZY_WEBHOOK_SECRET) - Uninstall the unused SDK
    npm uninstall stripe
    # or
    npm uninstall @lemonsqueezy/lemonsqueezy.js
If your schema has provider-specific fields you do not need, clean them up in schema.prisma (for example lemonSqueezyCustomerPortalUrl).
Stripe guide
1. Create a Stripe account
Create or log in to your Stripe account.
2. Get your test API keys
Go to Developers → API keys in test mode.
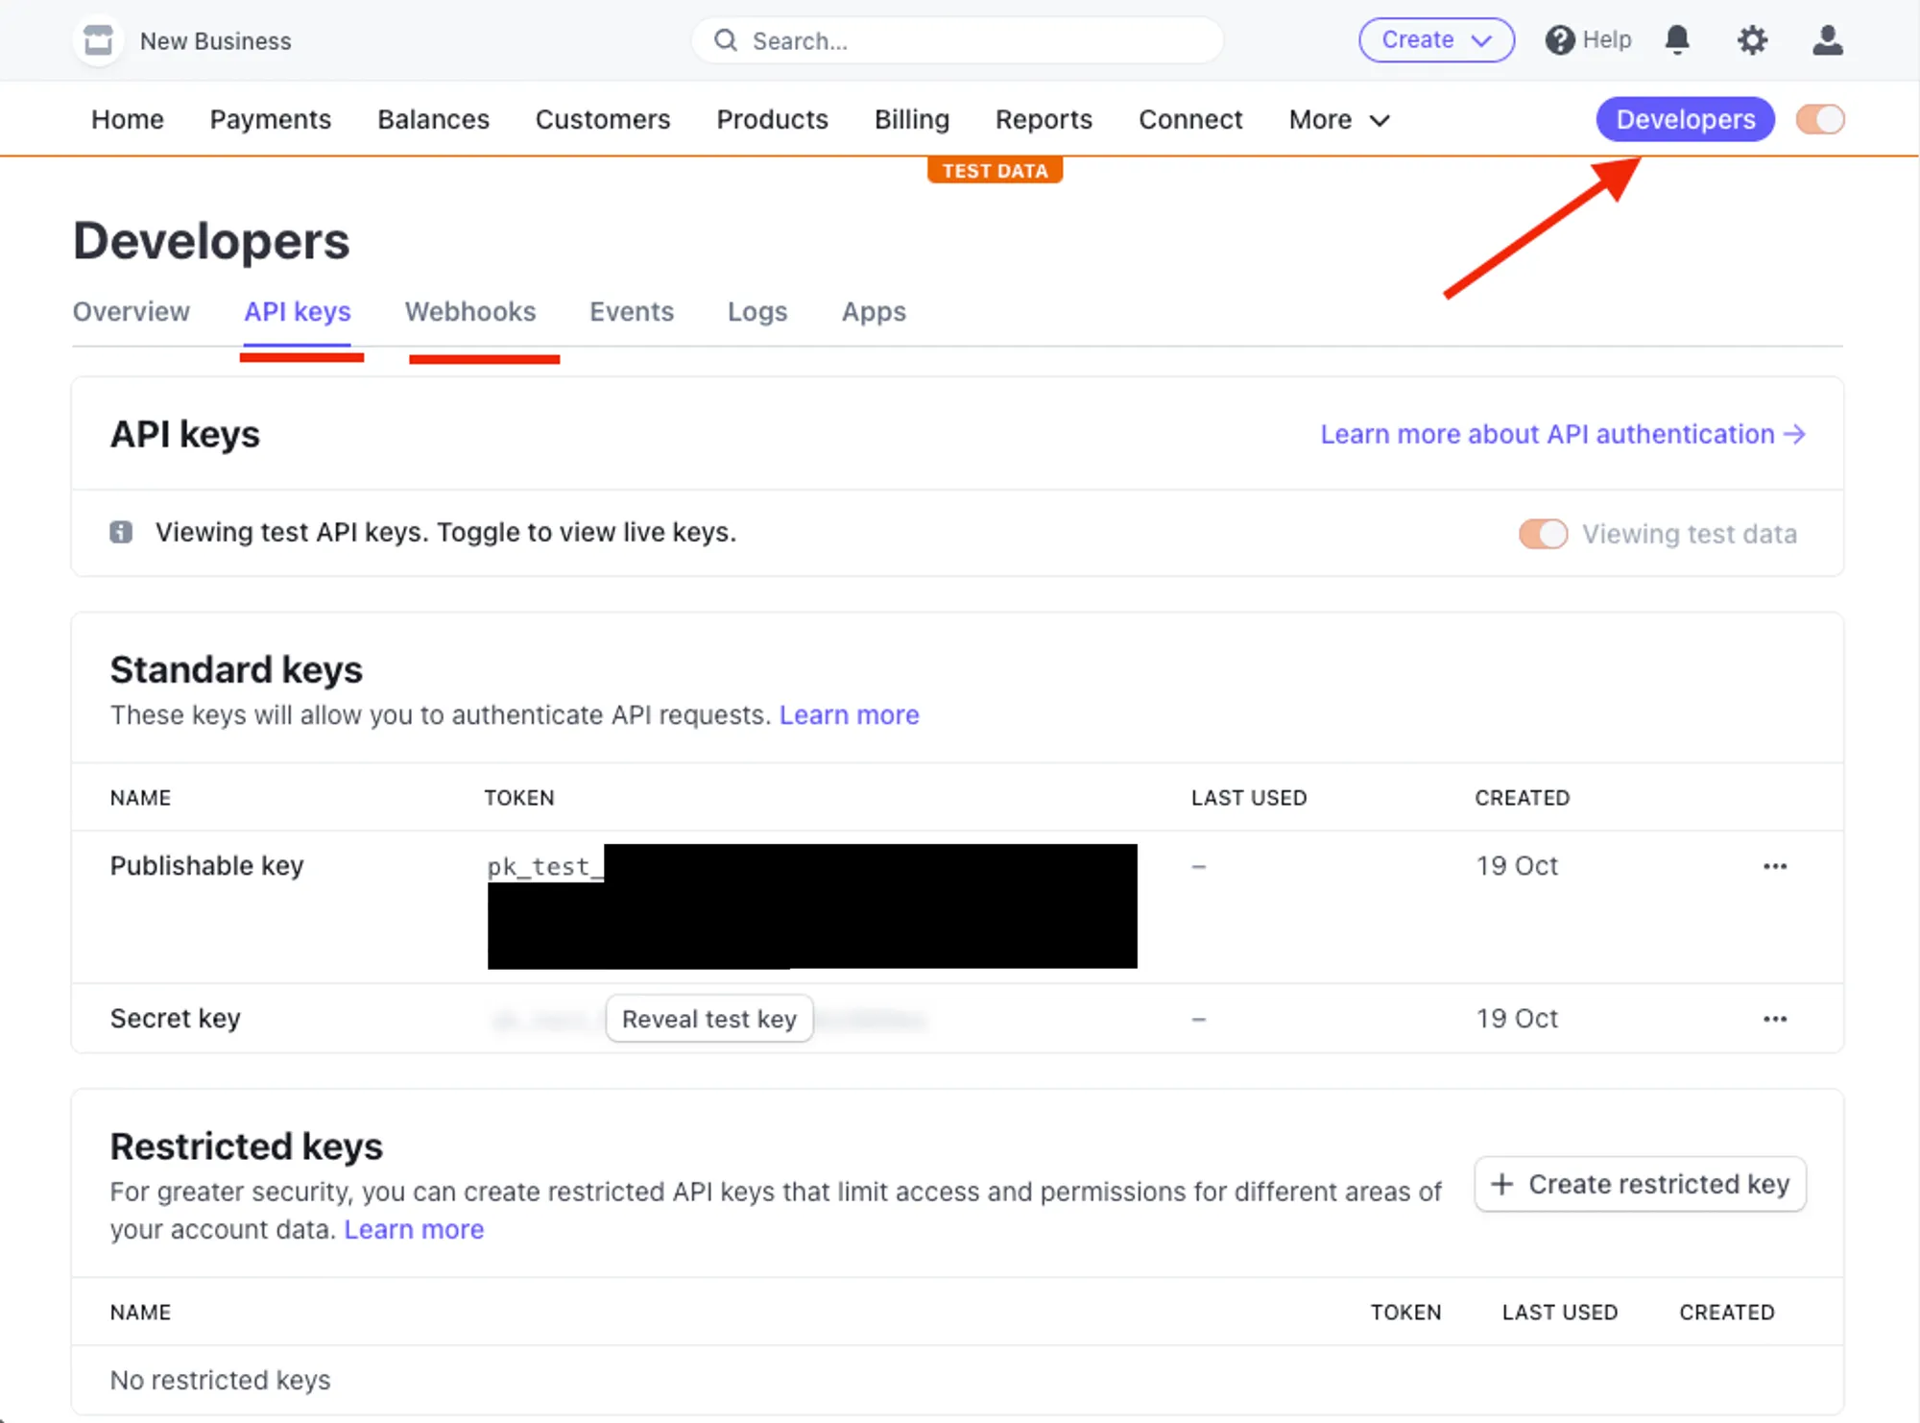
Click Reveal test key token and copy the Secret key. Add to .env.server:
STRIPE_API_KEY=sk_test_...
3. Create test products
Open test products and click Add a product.
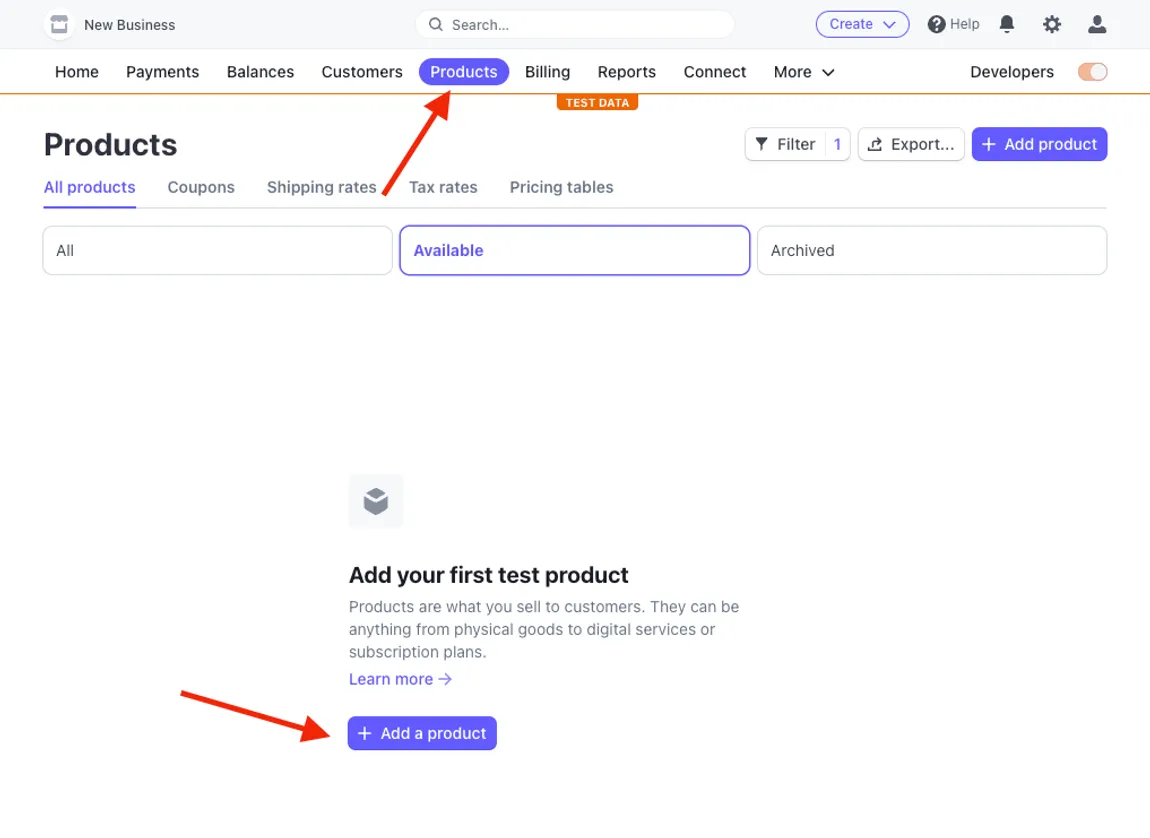
Recommended settings
- Product type: Software as a service (SaaS)
- Billing: Recurring for subscriptions or One-time for a credits product
If you want users to switch between two plans later, create two separate products, each with its own Price ID. If you want monthly and yearly tiers for the same product, click Add another price.
After saving, copy Price IDs from the product page.
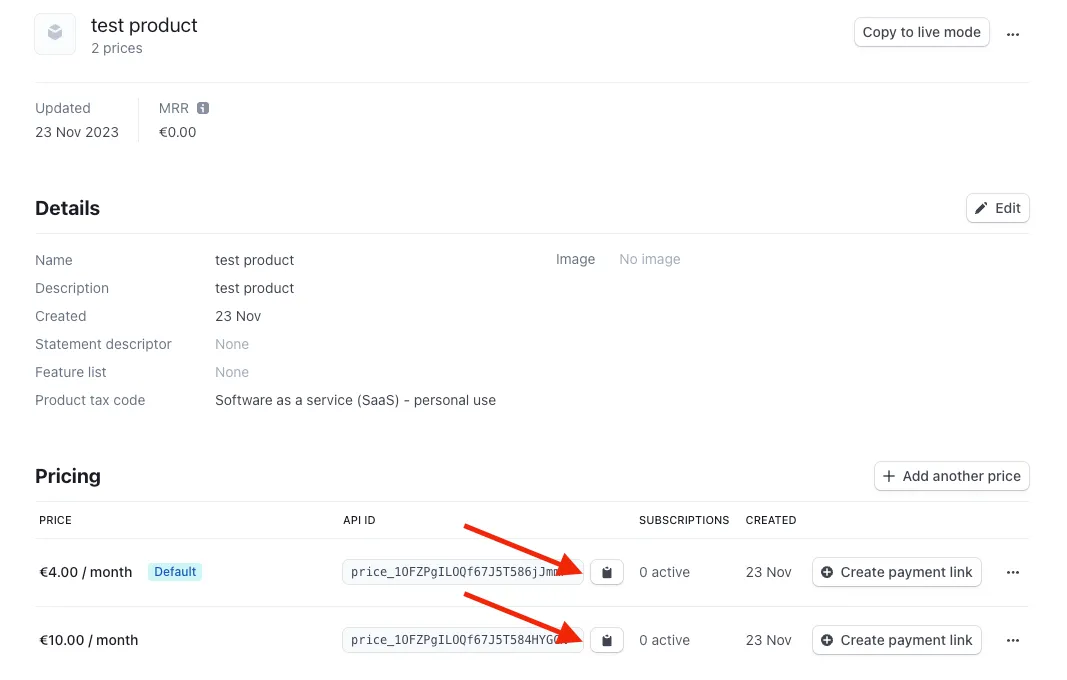
Add them to .env.server:
    PAYMENTS_HOBBY_SUBSCRIPTION_PLAN_ID=price_...
    PAYMENTS_PRO_SUBSCRIPTION_PLAN_ID=price_...
    PAYMENTS_CREDITS_10_PLAN_ID=price_...
4. Create a test customer
Open test customers and click Add a customer. Use an email you can access and will also use when logging into your app. This keeps the customer portal and app identity in sync.
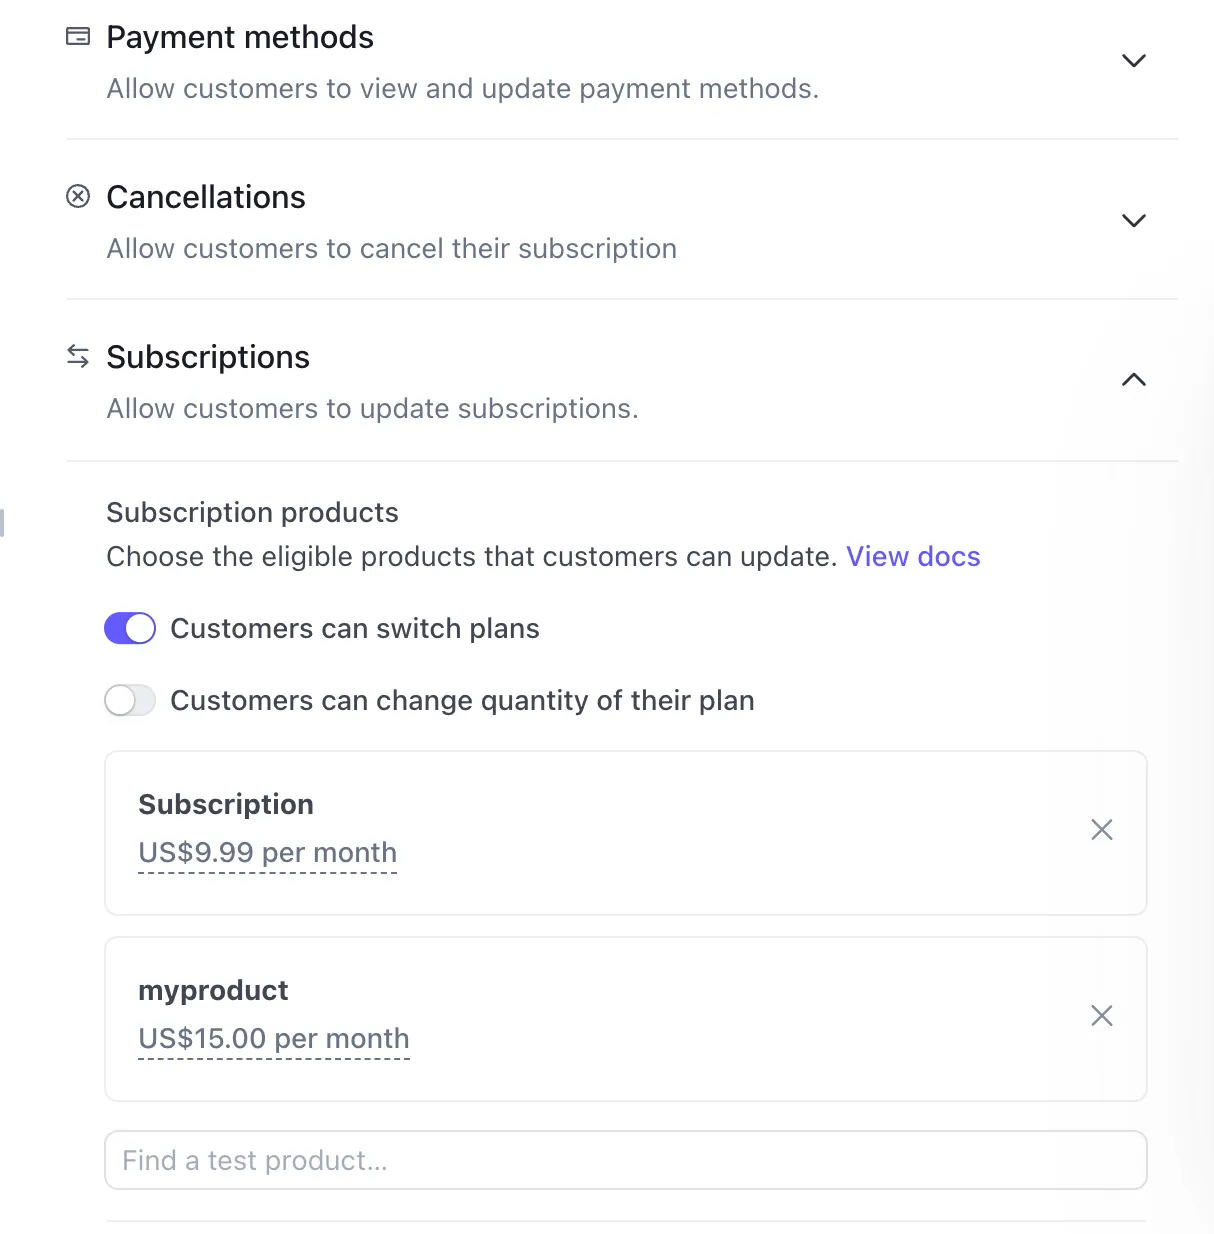
5. Set up the Customer Portal
Open Billing → Customer portal in test mode. Enable it and copy the portal link.
Add to .env.server:
STRIPE_CUSTOMER_PORTAL_URL=
To allow plan switching, enable Subscriptions → customers can switch plans in the portal settings.
6. Install the Stripe CLI
Install and log in.
    brew install stripe/stripe-cli/stripe
    stripe login
7. Start webhook forwarding and capture the signing secret
Forward to the Wasp server on port 3001.
stripe listen --forward-to localhost:3001/payments-webhook
You will see something like:
Ready! You are using Stripe API Version [2023-08-16].
Your webhook signing secret is whsec_...
Add to .env.server:
STRIPE_WEBHOOK_SECRET=whsec_...
If you are on an older template where the webhook path is different, use the path that matches your api paymentsWebhook in main.wasp.
8. Test webhooks via the CLI
stripe trigger payment_intent.succeeded
You should see events delivered and 200 responses in the forwarding terminal, for example:
--> invoice.paid [...]
<-- [200] POST http://localhost:3001/payments-webhook [...]
9. Test checkout in the client
- Click a Buy button in your app
- Use card
4242 4242 4242 4242, any future expiration, any CVC - Complete payment and confirm you hit the success page
- Check terminal logs for webhook handling
- Optionally verify the user in DB Studio
wasp db studio
Open http://localhost:5555 and confirm the user’s subscriptionStatus is active.
Unibee
First, go to /src/payment/paymentProcessor.ts and add the following line at the end of the file. Be sure to comment out the other two payment processor implementations.:
    // export const paymentProcessor: PaymentProcessor = lemonSqueezyPaymentProcessor;
    // export const paymentProcessor: PaymentProcessor = stripePaymentProcessor;
    export const paymentProcessor: PaymentProcessor = unibeePaymentProcessor;
The unibeePaymentProcessor can be imported like this:
import { unibeePaymentProcessor } from './unibee/paymentProcessor';
At this point, you can delete:
- the unused payment processor code within the
/src/payment/<unused-provider>directory, - any unused environment variables from
.env.server(they will be prefixed with the name of the provider you’re not using):
e.g. STRIPE_API_KEY, STRIPE_CUSTOMER_PORTAL_URL, LEMONSQUEEZY_API_KEY, LEMONSQUEEZY_WEBHOOK_SECRET
- Make sure to also uninstall the unused dependencies:
npm uninstall @lemonsqueezy/lemonsqueezy.js
or
npm uninstall stripe
- Remove any unused fields from the
Usermodel in theschema.prismafile if they exist:
e.g. lemonSqueezyCustomerPortalUrl
Now your code is ready to go with your preferred payment processor and it’s time to configure your payment processor’s API keys, products, and other settings.
Get your test UniBee API Keys
From the sidebar, go to Developers > Integration Resources, then copy the values for Unibee Public Key and Unibee Base URL. Paste them into .env.server as UNIBEE_PUBLIC_KEY and UNIBEE_API_URL, respectively.
Create Test Products
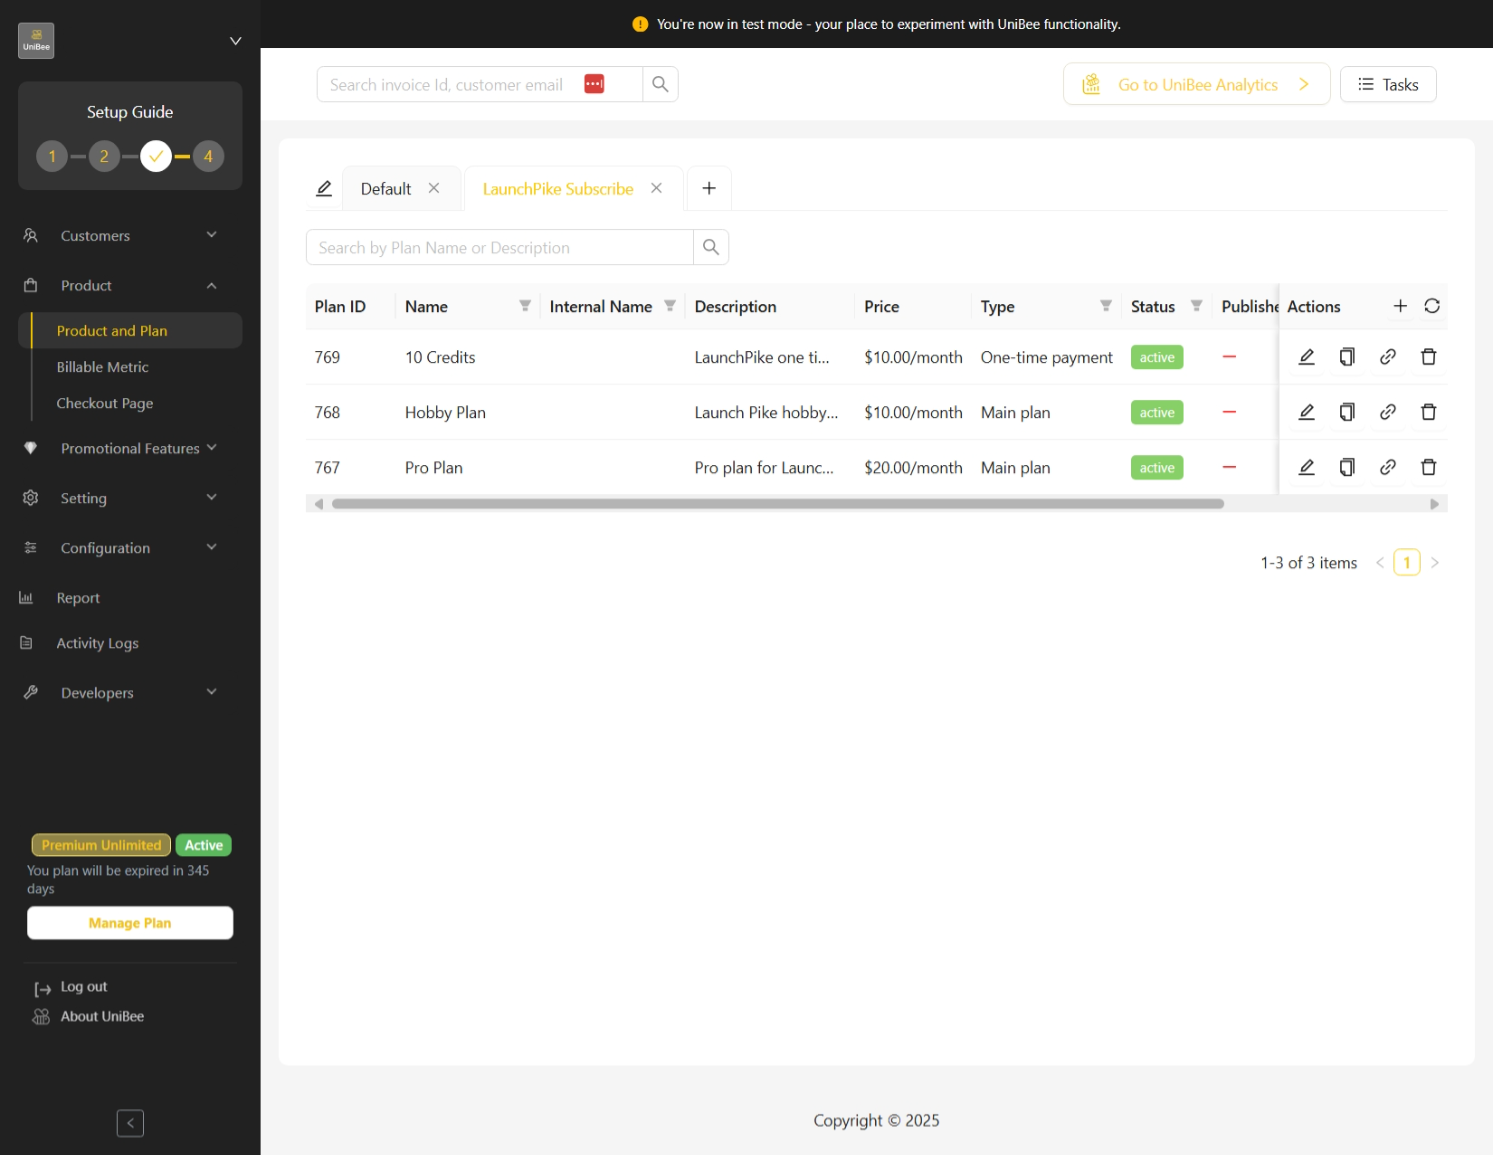
Follow the documents from UniBee | Create Test Products and create a new Product and Plans as follows:
Copy the plan IDs and paste them in the .env.server file
We’ve set you up with two example subscription product environment variables, PAYMENTS_HOBBY_SUBSCRIPTION_PLAN_ID= and PAYMENTS_PRO_SUBSCRIPTION_PLAN_ID=.
As well as a one-time payment product/credits-based environment variable, PAYMENTS_CREDITS_10_PLAN_ID=.
Note that if you change the names of the price IDs, you’ll need to update your server code to match these names as well
Set up the Customer Portal
Change the .env.server with the following value for UNIBEE_CUSTOMER_PORTAL_URL:
UNIBEE_CUSTOMER_PORTAL_URL=https://cs-sandbox.unibee.top/customer-portal
Create and Use the UniBee Webhook in Local Development
UniBee sends messages/updates to your Wasp app via its webhook, e.g. when a payment is successful. For that to work during development, we need to expose our locally running (via wasp start) Wasp app and make it available online, specifically the server part of it. Since the Wasp server runs on port 3001, you should run ngrok on port 3001, which will provide you with a public URL that you can use to configure UniBee with.
To do this, first make sure you have installed ngrok.
Once installed, and with your wasp app running, run:
ngrok http 3001
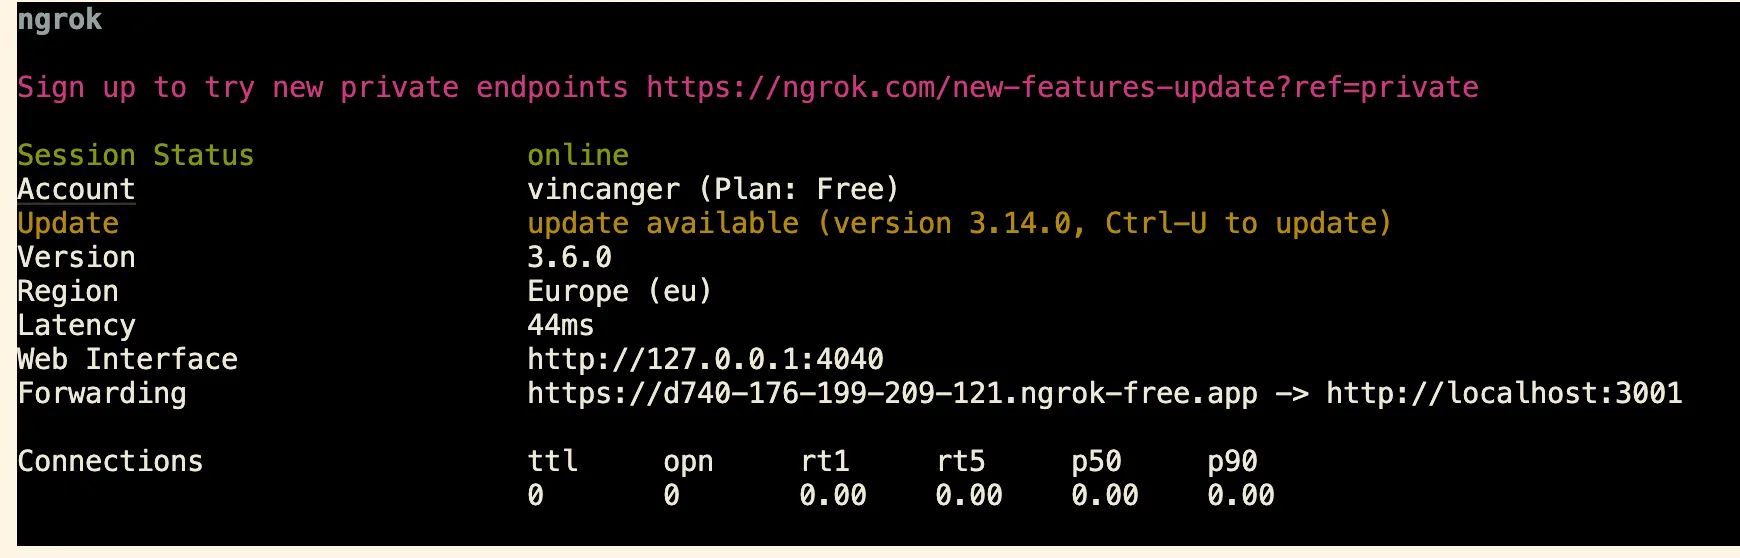
Ngrok will output a forwarding address for you. Copy and paste this address and add /payments-webhook to the end (this URL path has been configured for you already in main.wasp under the api paymentsWebhook definition). It should look something like this:
https://89e5-2003-c7-153c-72a5-f837.ngrok-free.app/payments-webhookGo to Configuration > Webhook and add a new Endpoint with the URL you got from previous step.
Select subscription.updated, subscription.created, subscription.cancelled, invoice.paid as events.
Deploying
Once you deploy your app, you can follow the same steps, just make sure that you are no longer in test mode within the UniBee Dashboard. After you’ve repeated the steps in live mode, add the new API keys and price/variant IDs to your environment variables in your deployed environment.
Lemon Squeezy
1. Create a Lemon Squeezy account in test mode
Log in and keep test mode on.
2. Get your test API key
Create an API key in settings.
Add to .env.server:
LEMONSQUEEZY_API_KEY=...
3. Get your Store ID
Copy it from the dashboard top right.
Add to .env.server:
LEMONSQUEEZY_STORE_ID=12345
4. Create test products
Open Products and click New Product.
- Tax category: Software as a service (SaaS)
- Choose Subscription for recurring plans or Single Payment for a credits product
For subscription products with tiers, add variants (for example Hobby, Pro).
Copy the Variant ID for each subscription tier.
Add to .env.server:
    PAYMENTS_HOBBY_SUBSCRIPTION_PLAN_ID=variant_...
    PAYMENTS_PRO_SUBSCRIPTION_PLAN_ID=variant_...
    PAYMENTS_CREDITS_10_PLAN_ID=variant_...
If you change variable names, update your app code accordingly.
5. Create and use the Lemon Squeezy webhook in local development
Expose your local Wasp server on port 3001 with ngrok.
ngrok http 3001
Copy the https forwarding URL and append /payments-webhook, for example https://abc123.ngrok.app/payments-webhook
In the Lemon Squeezy Webhooks dashboard:
- Click + to add a webhook
- Set Callback URL to the ngrok URL above
- Set a long random signing secret and add it to
.env.server:
LEMONSQUEEZY_WEBHOOK_SECRET=<your-secret>- Subscribe to these events:
order_created,subscription_created,subscription_updated,subscription_cancelled - Save
You are now ready to receive Lemon Squeezy events locally.
Deploying to production
1. Move from test to live mode in Stripe or Lemon Squeezy
Repeat the same steps in live mode. Create live products and keys.
2. Update environment variables on your deployed server
Replace all test keys and IDs with live values.
3. Create the production webhook
Stripe: set the endpoint to your deployed server URL plus /payments-webhook and store the live signing secret.
Lemon Squeezy: same endpoint pattern and a new production signing secret.
4. Customer portal and social auth redirect URLs
Confirm your production URLs are set in provider dashboards and in your .env files.
That is it. Payments are now wired for both local testing and production.