Deploying
This React/Node.js/Postgres app supports a one-command deploy to Fly.io or a manual deploy to any provider.
Fastest path: use the one-command deploy. Prefer another host or split front/back ends? See Deploying Manually below.
Deploying your app
Use the sequence below to deploy your app:
- Get your production API keys and environment variables
- Deploy your app easily to Fly.io or manually to any provider.
- Add the correct redirect URL’s to your social auth credentials
- Set up your production webhooks for either Stripe, UniBee, Lemon Squeezy
- Set your production environment variables on your deployed apps
- (Optional) Deploy your blog
Prerequisites
AWS S3 CORS
If you use AWS S3, add your production domain to the bucket CORS AllowedOrigins. See File Uploading guide.
Env vars checklist
Before deploying, confirm all keys and variables.
Payment Processor vars
In Payments Integration you used test keys and test product IDs. For production, repeat the same steps with live mode and add the live keys to the deployed environment.
Other vars
Many will match development, but double-check. Full list:
General:
DATABASE_URLJWT_SECRETWASP_WEB_CLIENT_URLWASP_SERVER_URL
OpenAI:
OPENAI_API_KEY
SendGrid:
SENDGRID_API_KEY
Social auth:
GOOGLE_CLIENT_IDGOOGLE_CLIENT_SECRETGITHUB_CLIENT_IDGITHUB_CLIENT_SECRET
Analytics:
REACT_APP_PLAUSIBLE_ANALYTICS_IDPLAUSIBLE_API_KEYPLAUSIBLE_SITE_IDPLAUSIBLE_BASE_URLREACT_APP_GOOGLE_ANALYTICS_IDGOOGLE_ANALYTICS_CLIENT_EMAILGOOGLE_ANALYTICS_PROPERTY_IDGOOGLE_ANALYTICS_PRIVATE_KEYNote: convert the JSON private key to base64 first withecho -n "PRIVATE_KEY" | base64
See Analytics docs [link] for details
AWS S3:
AWS_S3_IAM_ACCESS_KEYAWS_S3_IAM_SECRET_KEYAWS_S3_FILES_BUCKETAWS_S3_REGION
Deploying to Fly.io
Fly.io is a global app platform - great for SaaS because you can spin up for free, run frontend + backend together, scale easily, and deploy with a single command.
Use wasp deploy to ship the whole stack-DB, server, and client-in a single command. For the step-by-step, follow the official Deploy to Fly with the Wasp CLI guide; work through it carefully to get live.
Setting Environment Variables
We're using some client-side env vars, so pass them to yourwasp deploy commands to include them in the build.
REACT_APP_CLIENT_ENV_VAR_1=<...> REACT_APP_CLIENT_ENV_VAR_2=<...> wasp deploy
The deploy command handles the following server-side envs automatically:
DATABASE_URL · PORT · JWT_SECRET · WASP_WEB_CLIENT_URL · WASP_SERVER_URL
Deploying manually or to other providers
If you’d rather deploy the frontend and backend separately - or use your own host - see the Manual Deployment guide.
Client-side environment variables on manual builds
Append client-side vars to your build command, for example:
REACT_APP_CLIENT_ENV_VAR_1=<...> npm run buildAdding server redirect URLs to social auth
After deploying your server, add correct redirect URIs in each provider’s app settings. Use the Wasp docs for:
Setting up your production Stripe webhook
Follow these steps when preparing for production.
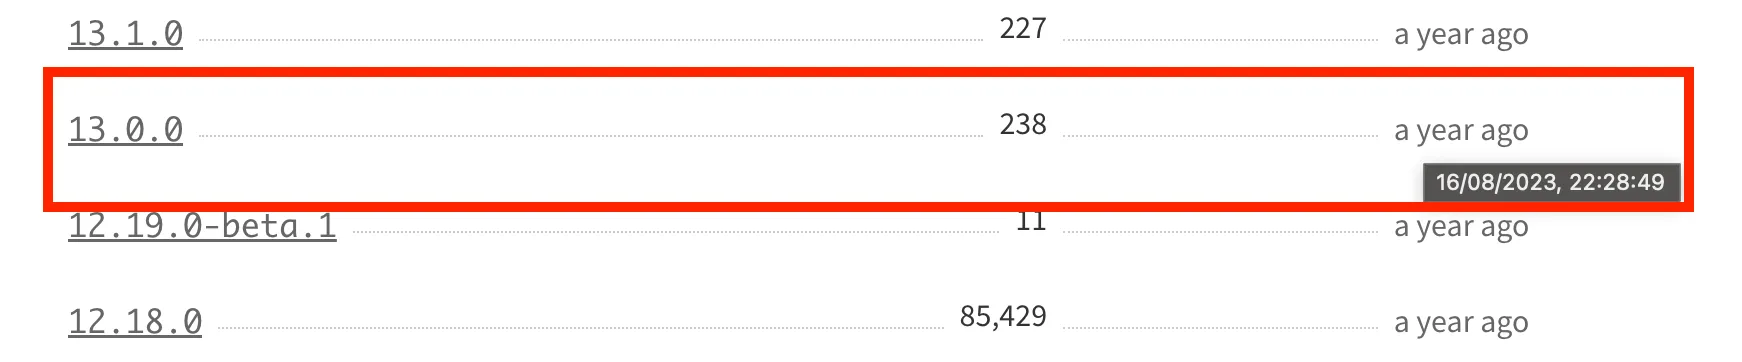
Stripe API versions
Your Stripe account is tied to the current API version at the time you create it - and that dictates webhook response formats and request expectations. Since this template assumes a particular version, your account’s version could differ. Test any change before deploying.
Reference in code:
export const stripe = new Stripe(process.env.STRIPE_API_KEY!, {
  apiVersion: 'YYYY-MM-DD', // e.g. 2023-08-16
});Steps to align versions:
- Find your default API version in Stripe dashboard under Developers
- Confirm it matches your
src/payment/stripe/stripeClient.ts:
export const stripe = new Stripe(process.env.STRIPE_KEY!, {
  apiVersion: 'YYYY-MM-DD', // e.g. 2023-08-16
});- If they do not match, choose one of:
- If your dashboard’s default equals the latest API, upgrade the Stripe NPM package to the latest
- If your dashboard’s default is not the latest and you do not want to upgrade, install the Stripe NPM version that matches that date
How to find the NPM version that matches your default date:
- Note the date of your default API version in the developer dashboard
- Open the Stripe NPM package page and hover Published until you find the release matching your date
Install that exact package version:
npm install [email protected] # e.g. npm install [email protected]Test your app thoroughly after changing the client version.
Creating your production webhook
- Go to https://dashboard.stripe.com/webhooks
- Click + add endpoint
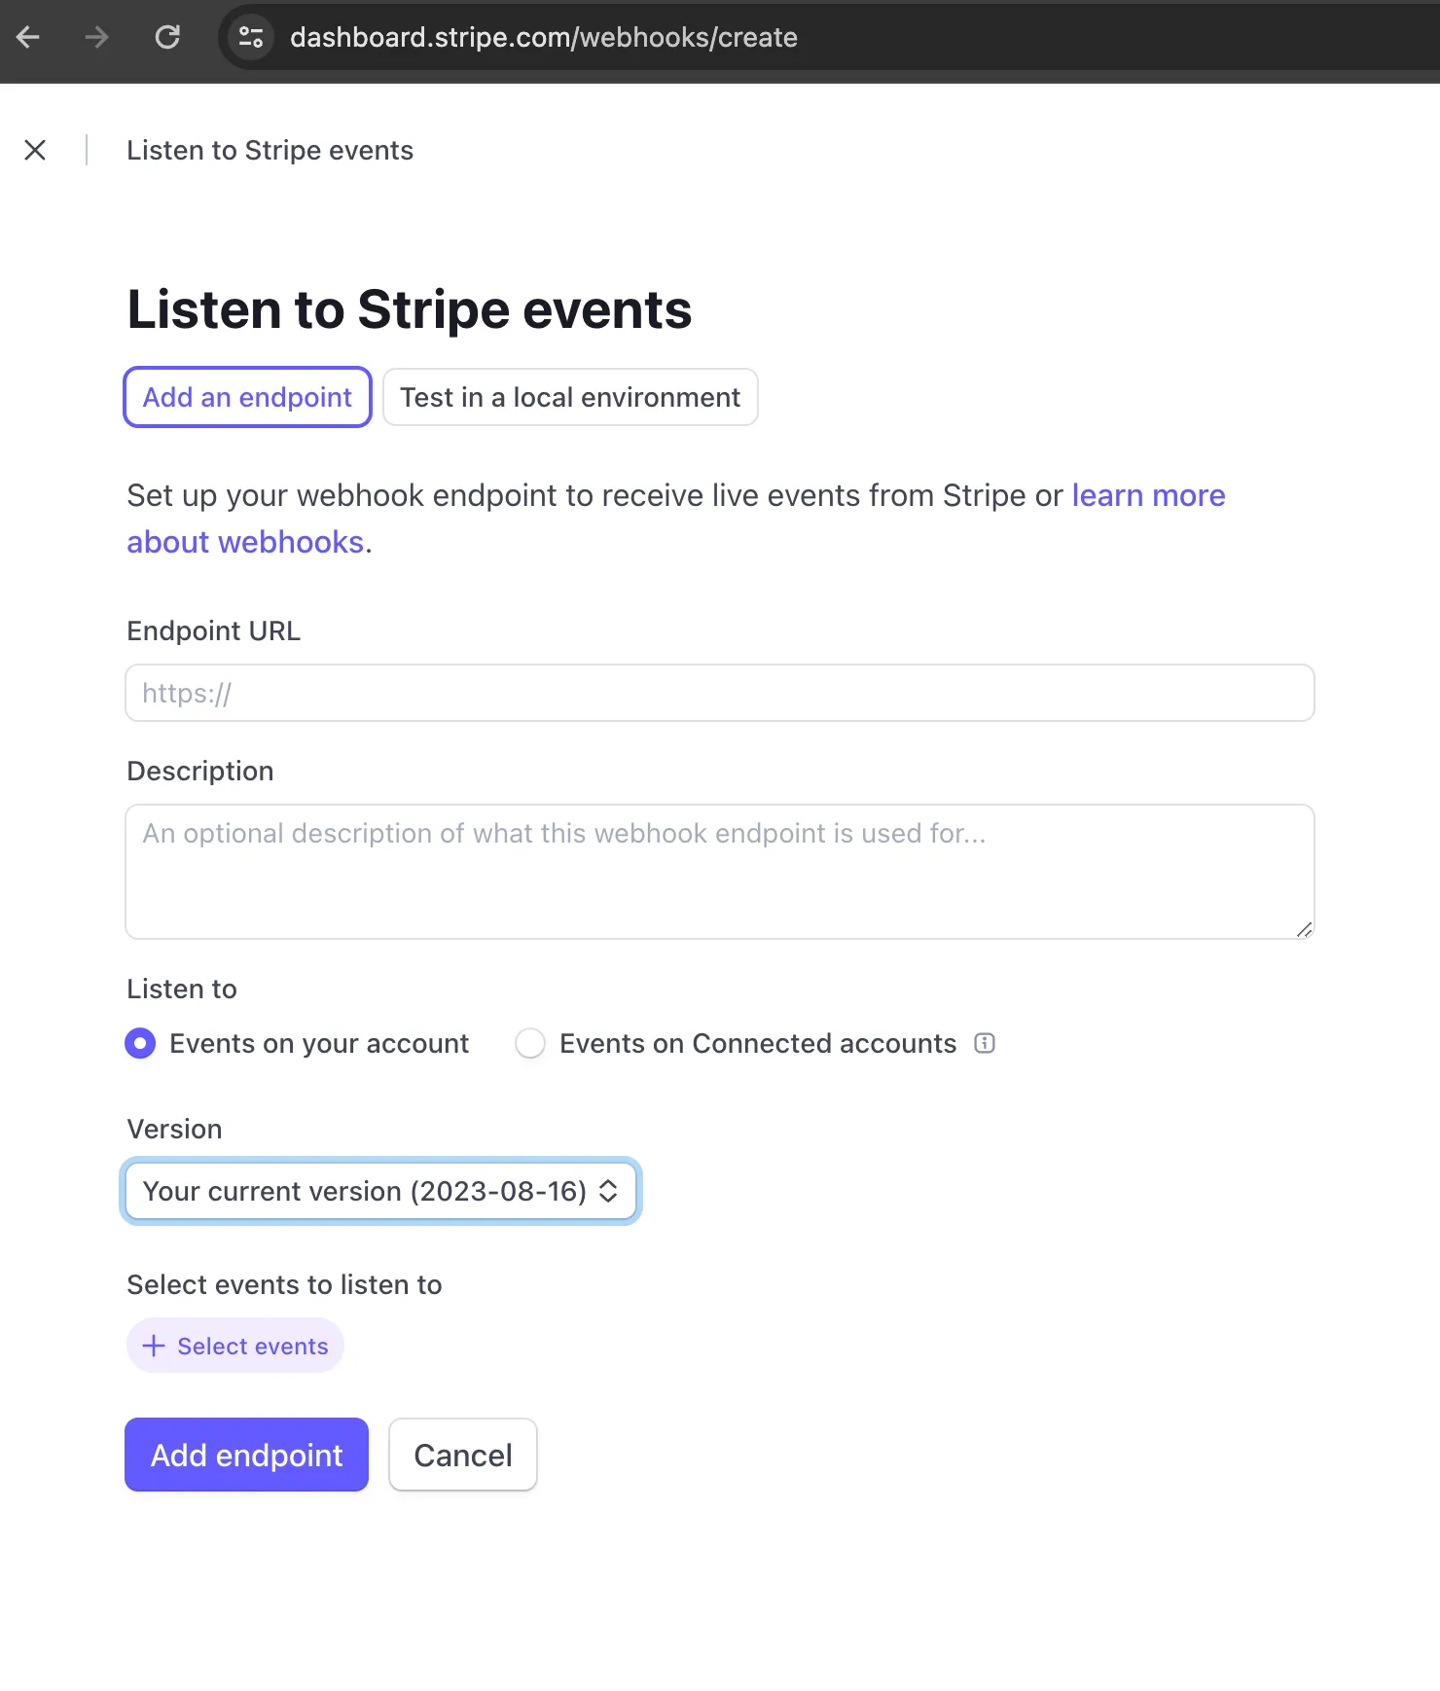 3.Enter your endpoint URL which is your deployed server URL plus
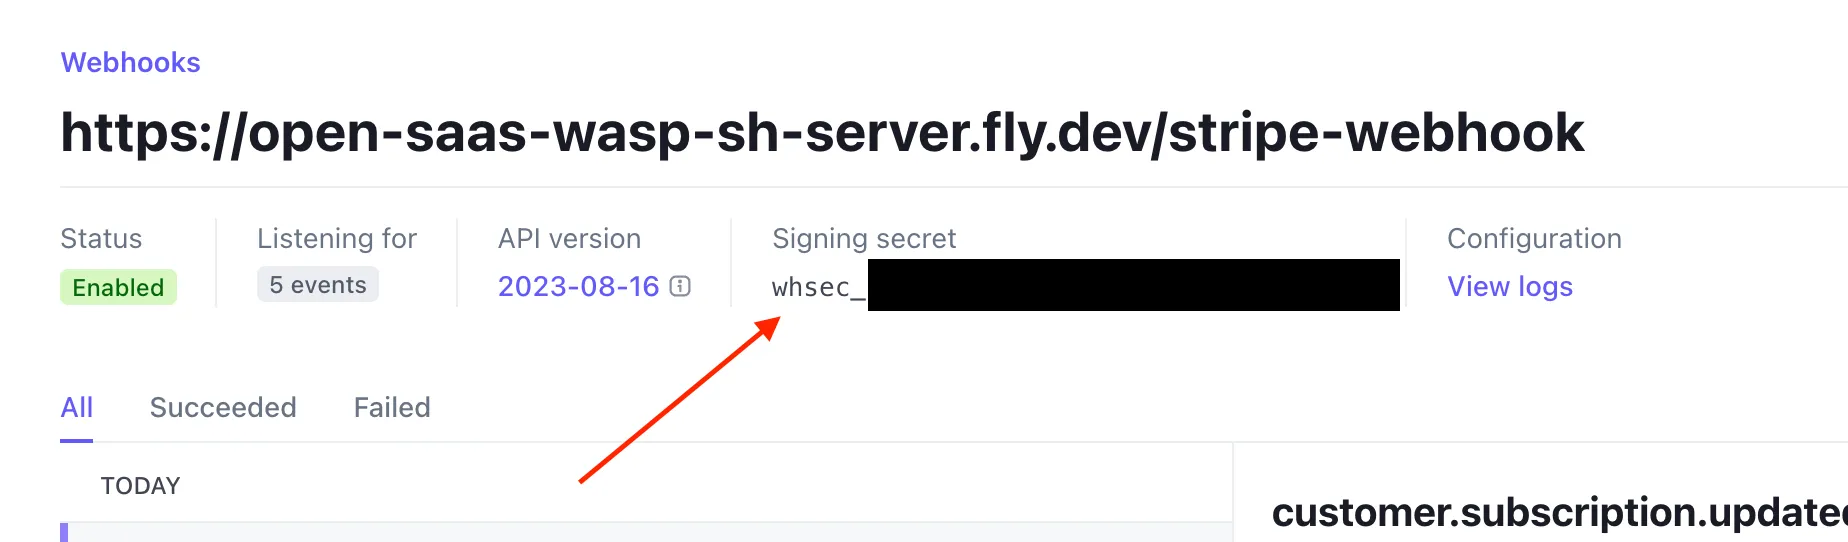
 /payments-webhookFor example:https://open-saas-wasp-sh-server.fly.dev/payments-webhook
- Select the events to listen to. Use the same events your webhook consumes as listed in
src/payment/stripe/webhookPayload.ts - Reveal the signing secret on the webhook page
- Add this secret to your server environment as
STRIPE_WEBHOOK_SECRETIf deployed to Fly.io, run:
wasp deploy fly cmd --context server secrets set STRIPE_WEBHOOK_SECRET=whsec_...Setting up your production Lemon Squeezy webhook
Your endpoint is your deployed server URL plus /payments-webhook, for example:
https://open-saas-wasp-sh-server.fly.dev/payments-webhook
In the Lemon Squeezy Webhooks Dashboard:
- Click the + button
- Add the Callback URL
- Create a long random signing secret
- Add it as
LEMONSQUEEZY_WEBHOOK_SECRETin your server production environment - Select at least these events:
order_createdsubscription_createdsubscription_updatedsubscription_cancelled
- Save